
Why I Built My Journey Hub
As someone who loves hit-the-road expeditions, I grew incredibly frustrated with modern travel planners. Most apps force you into mandatory cloud synchronization, track your location background data continuously, and instantly stop working the exact second you drive into a cellular dead zone.
I built My Journey Hub out of necessity. I wanted a clean, fast, and practical tool designed specifically for road trippers. A tool that operates entirely on your phone's hardware, stores data locally without hidden tracking, and treats your battery and privacy with respect. It's built for the highway—no matter how far off the grid you go.
See My Journey Hub in Action
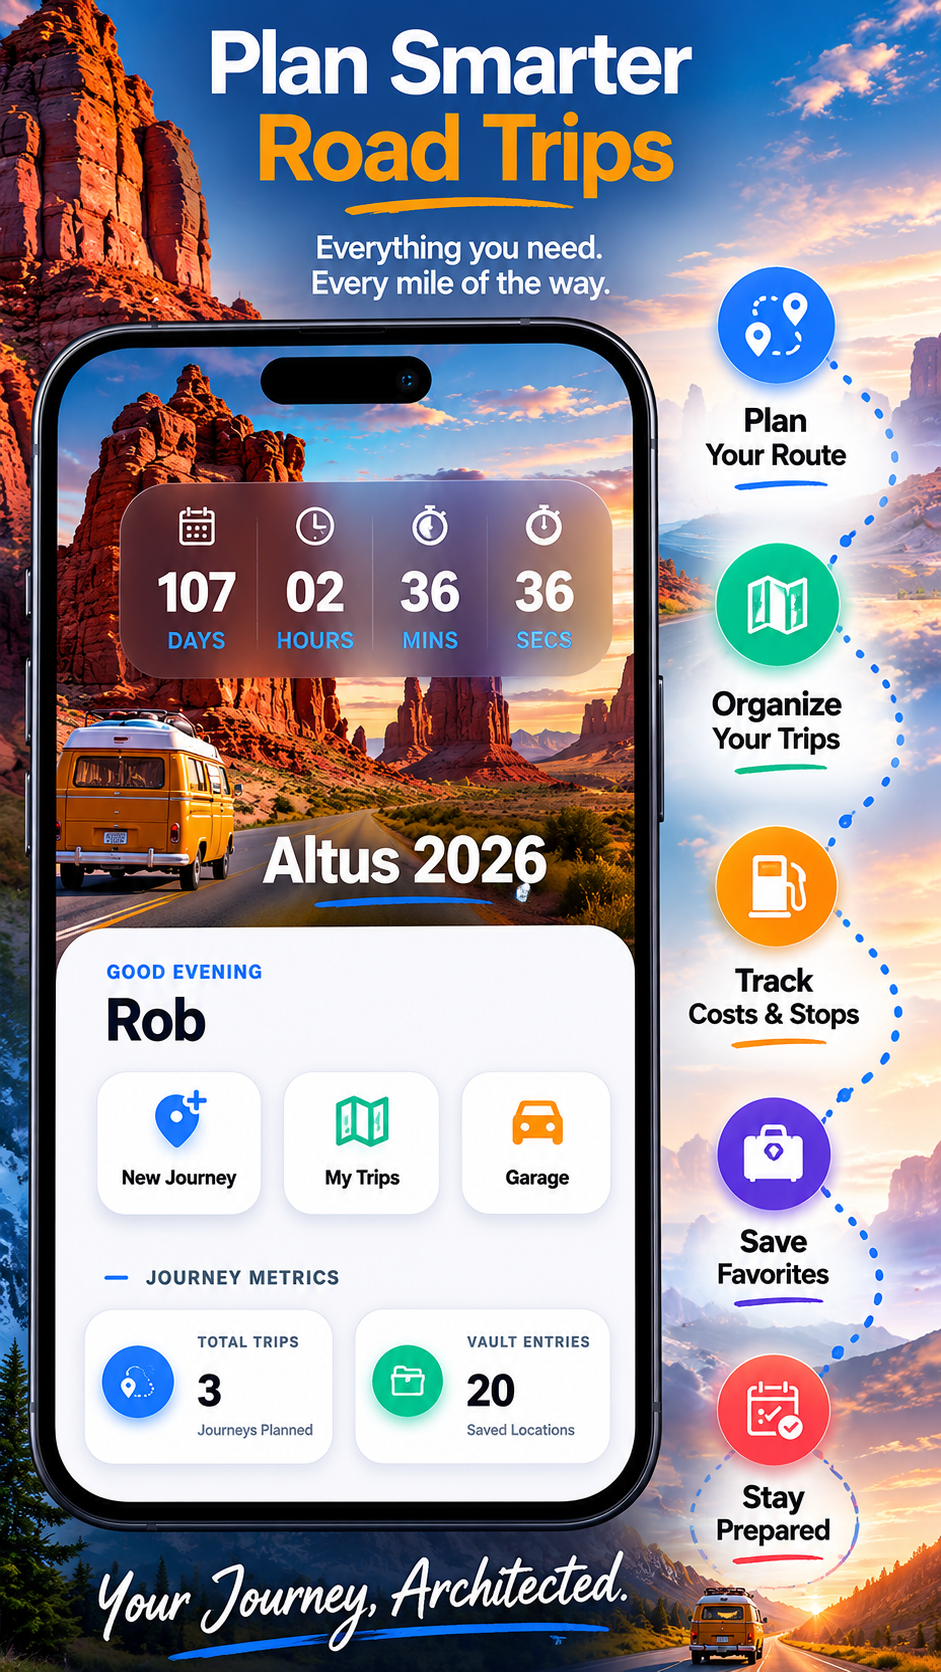
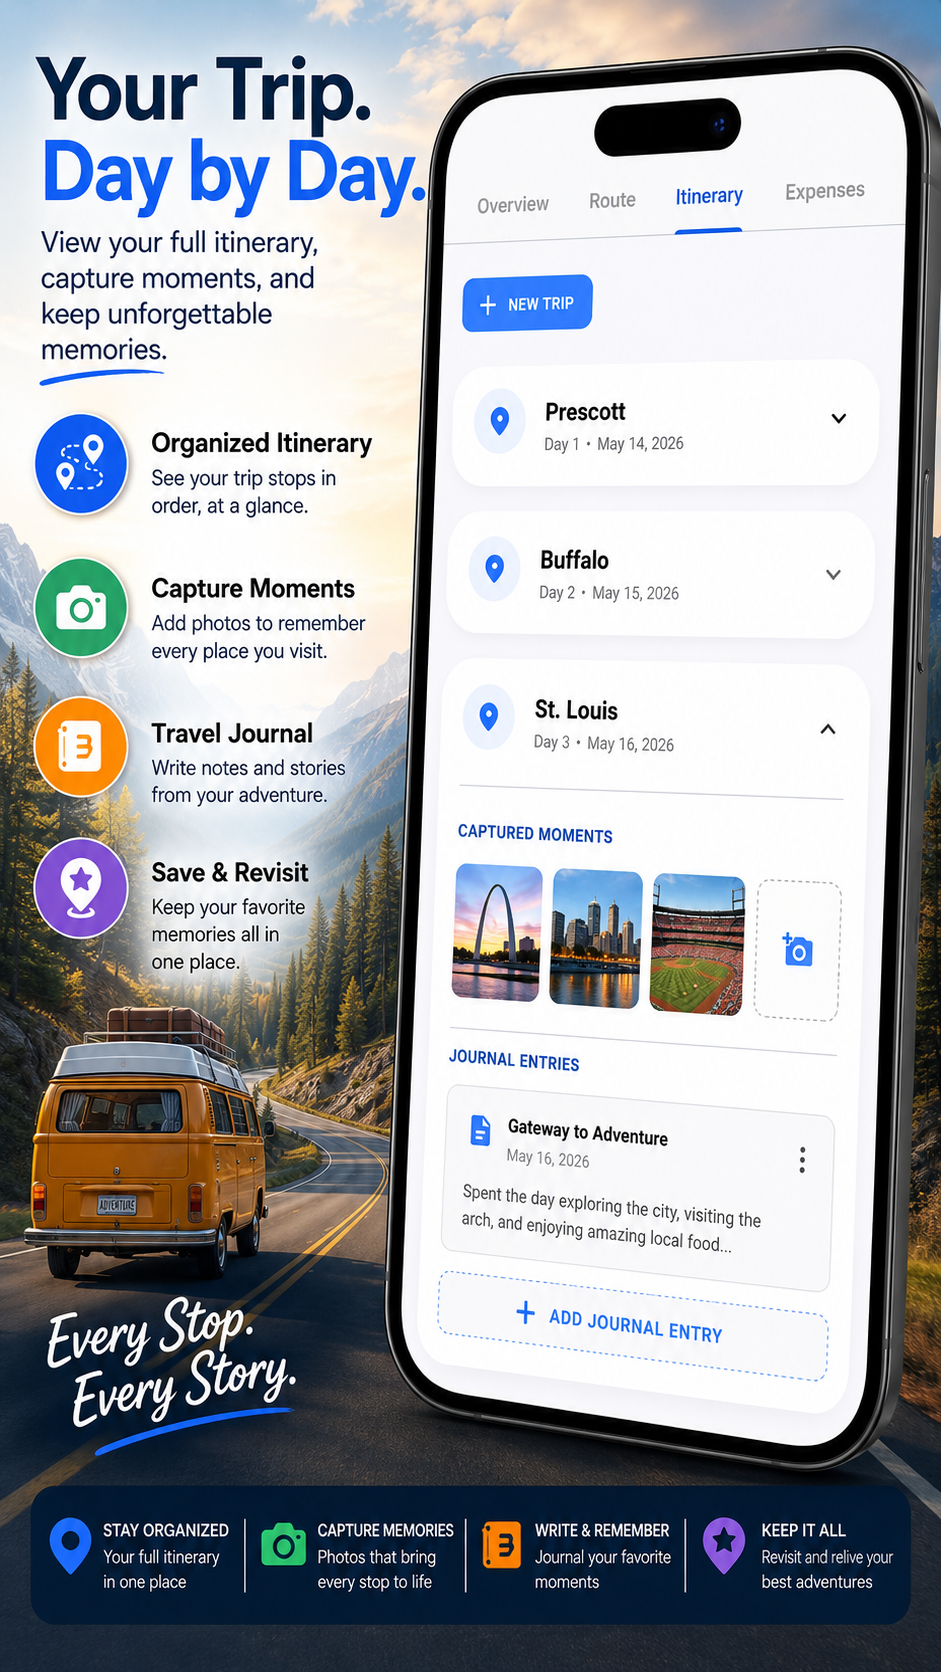
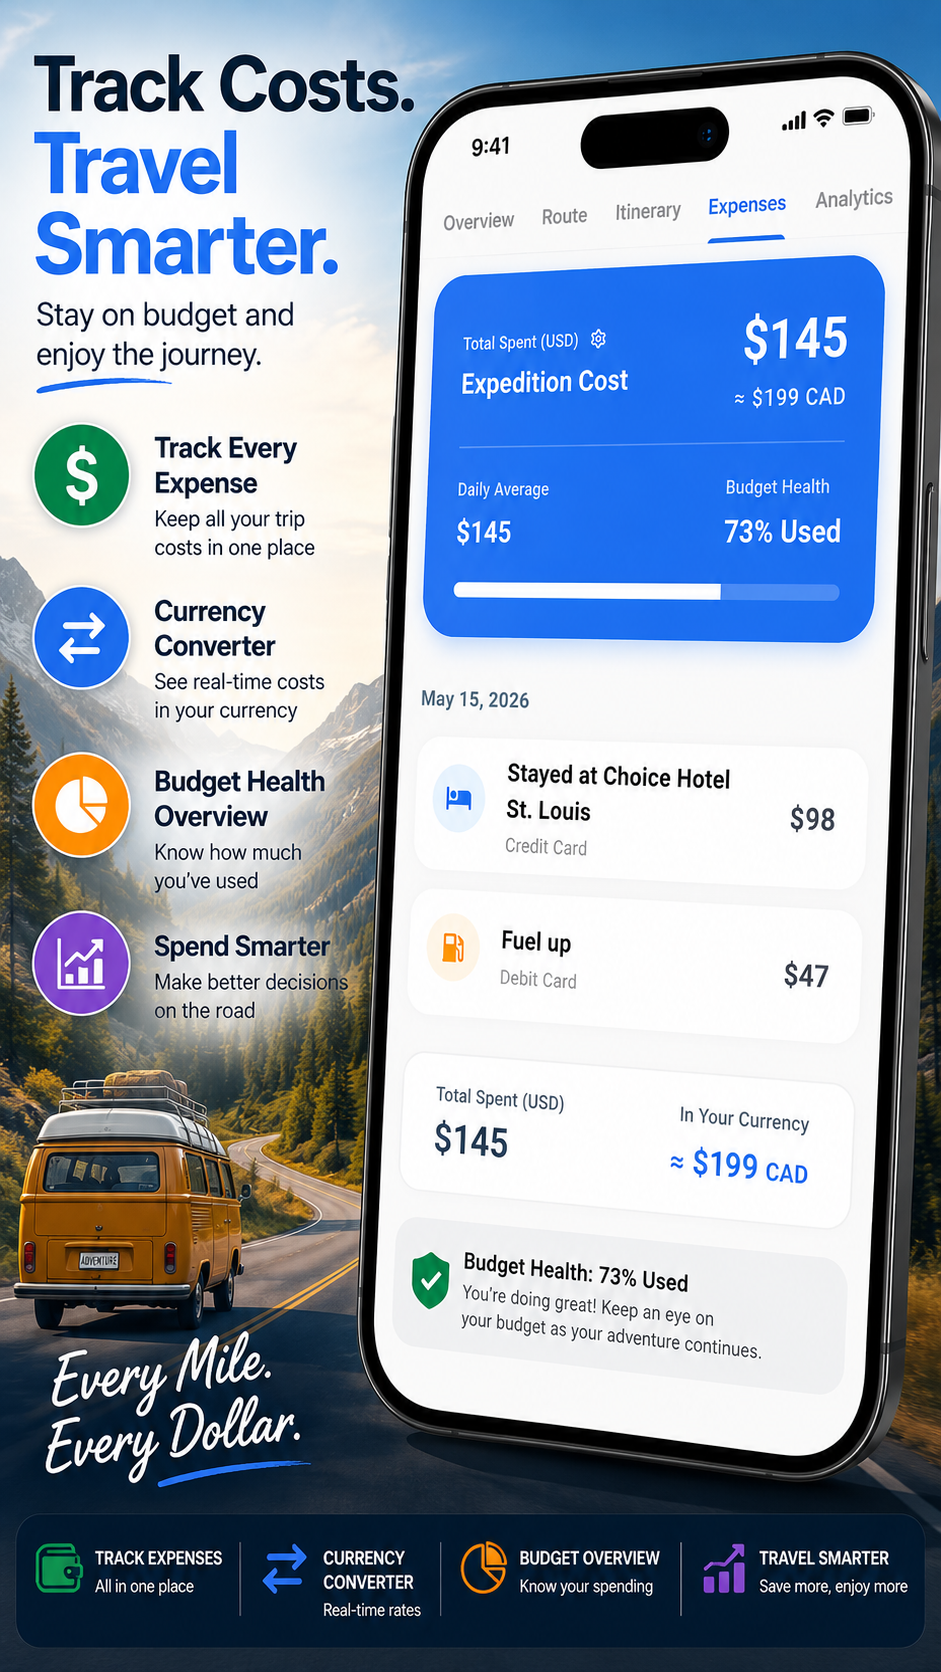
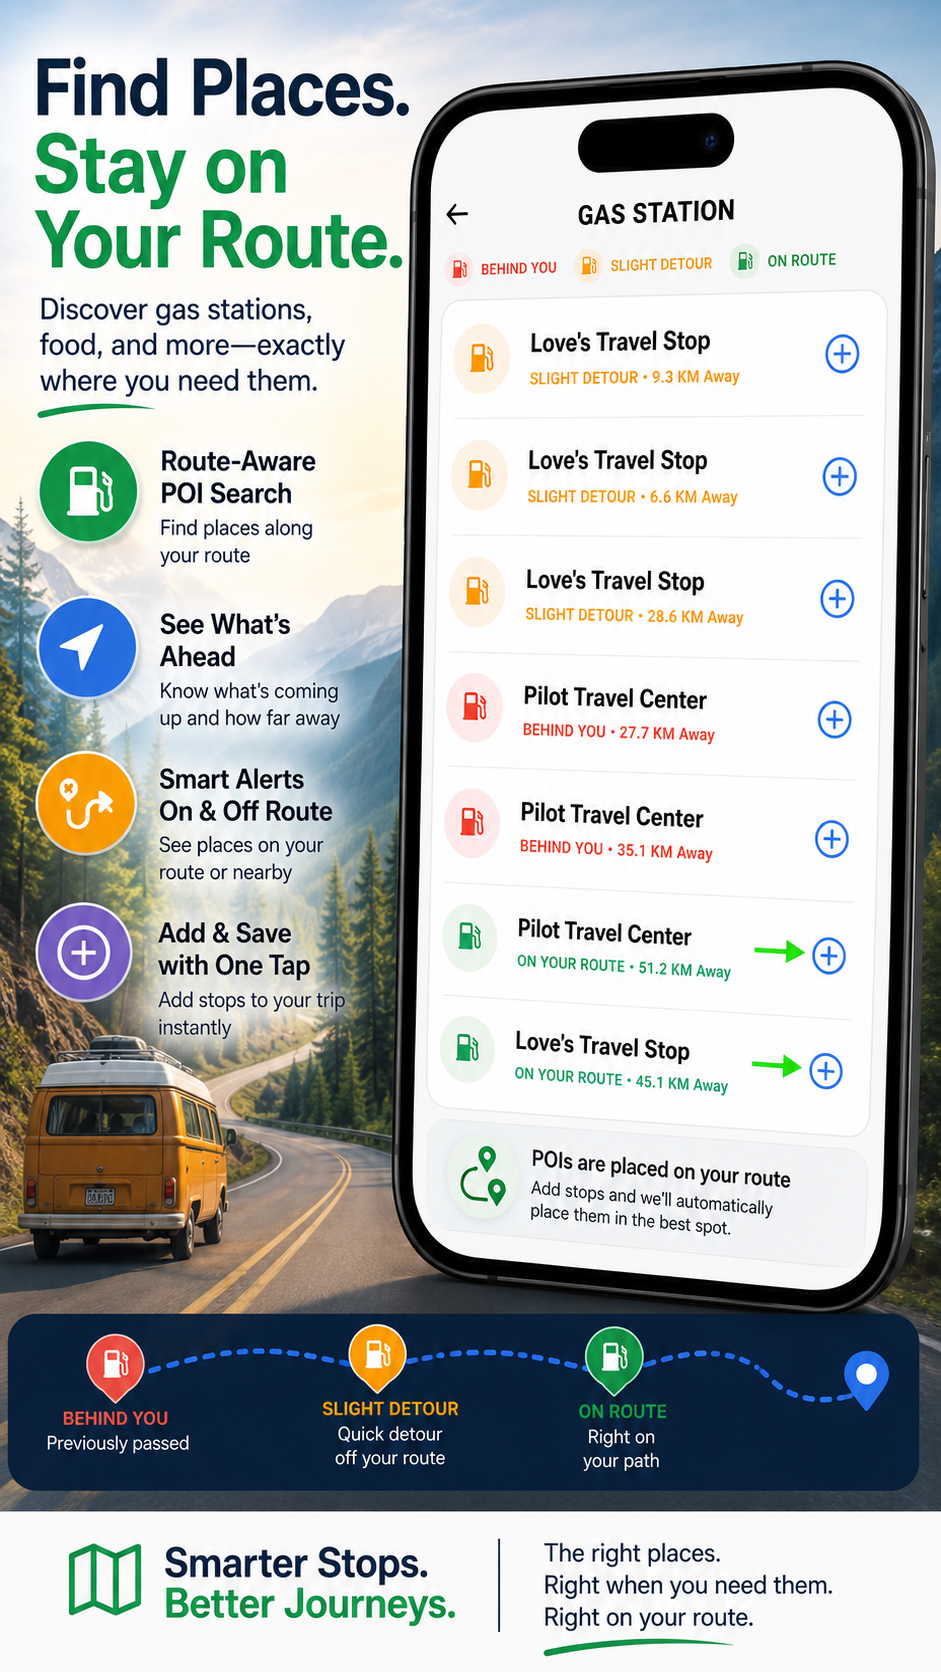
Preview the trip planner, route tools, itinerary, expenses, and point-of-interest search.
Tap any preview below to open full screen:
Core Features
Offline-First Reliability: Plan and track your entire road trip without needing a data connection. Powered by Hive local storage, your trip details stay safely on your device—ready for the road, even in cellular dead zones.
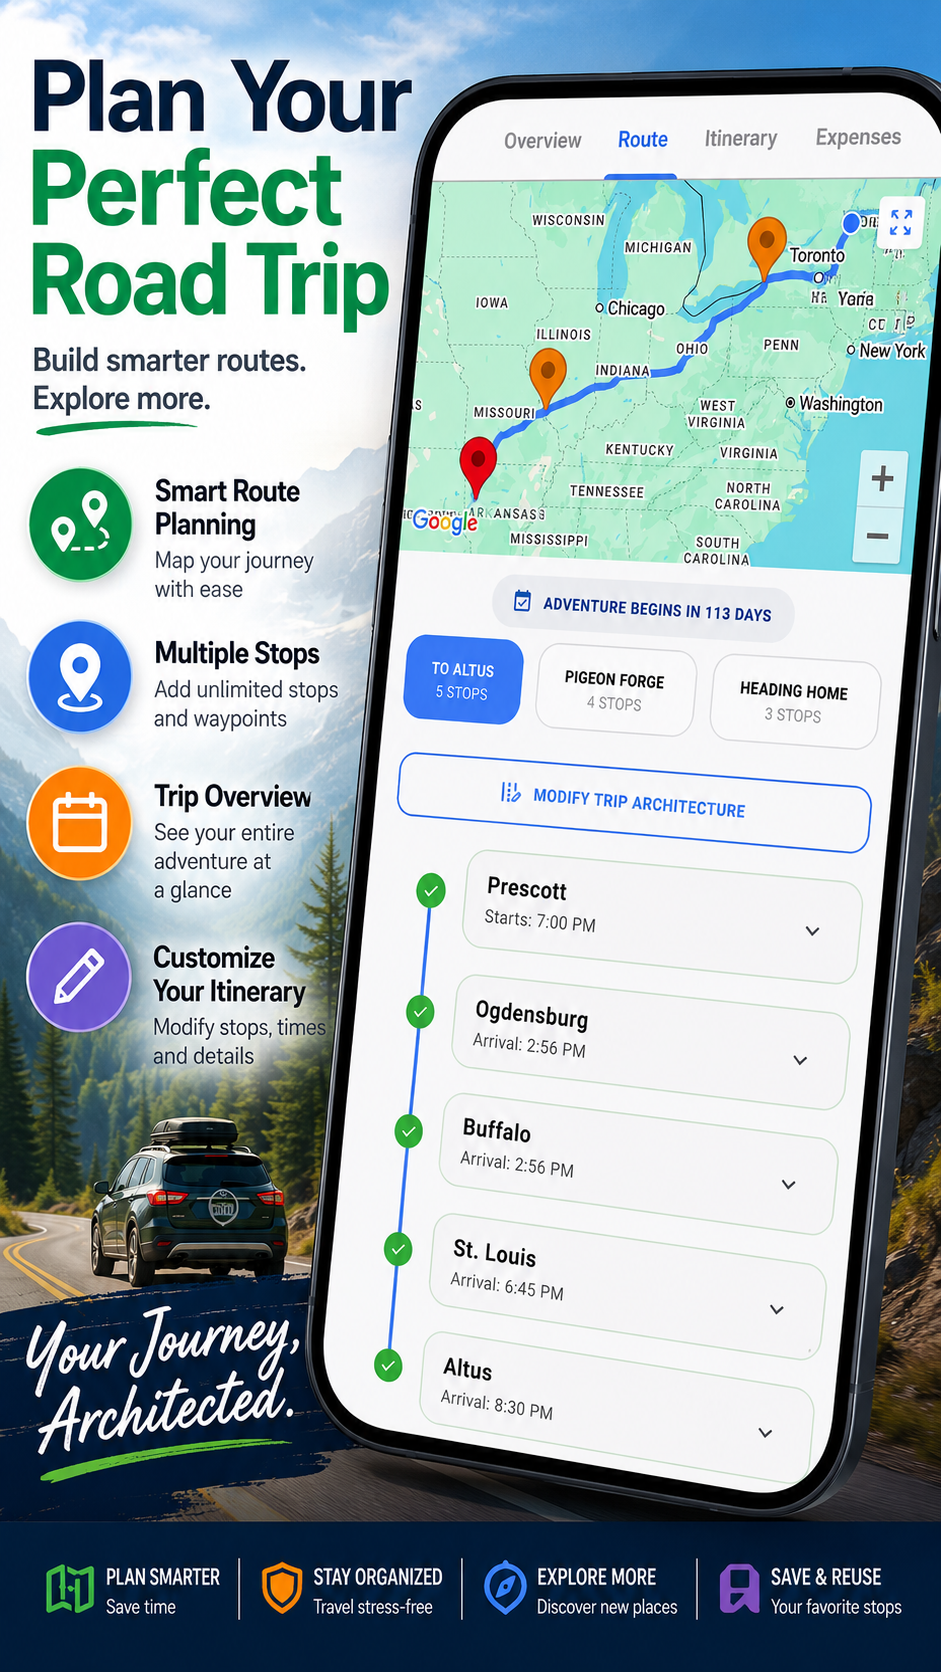
Multi-Stop Route Planning: Break your long road trip into easy, bite-sized "legs." Log planned stop times and track your odometer readings to keep your itinerary running smoothly.
Saved Places: Securely save your favorite waypoints—from hidden scenic lookouts to essential roadside diner stops—so you never lose track of a great destination.
Trip Overview: Get a quick dashboard view of your trip’s vital stats, showing total distance covered and how you're tracking against your original plan.
Privacy-First Design: Your trips belong to you. My Journey Hub operates on a strict "Local-Only" data policy, giving you professional travel tools with absolutely zero invasive cloud tracking.
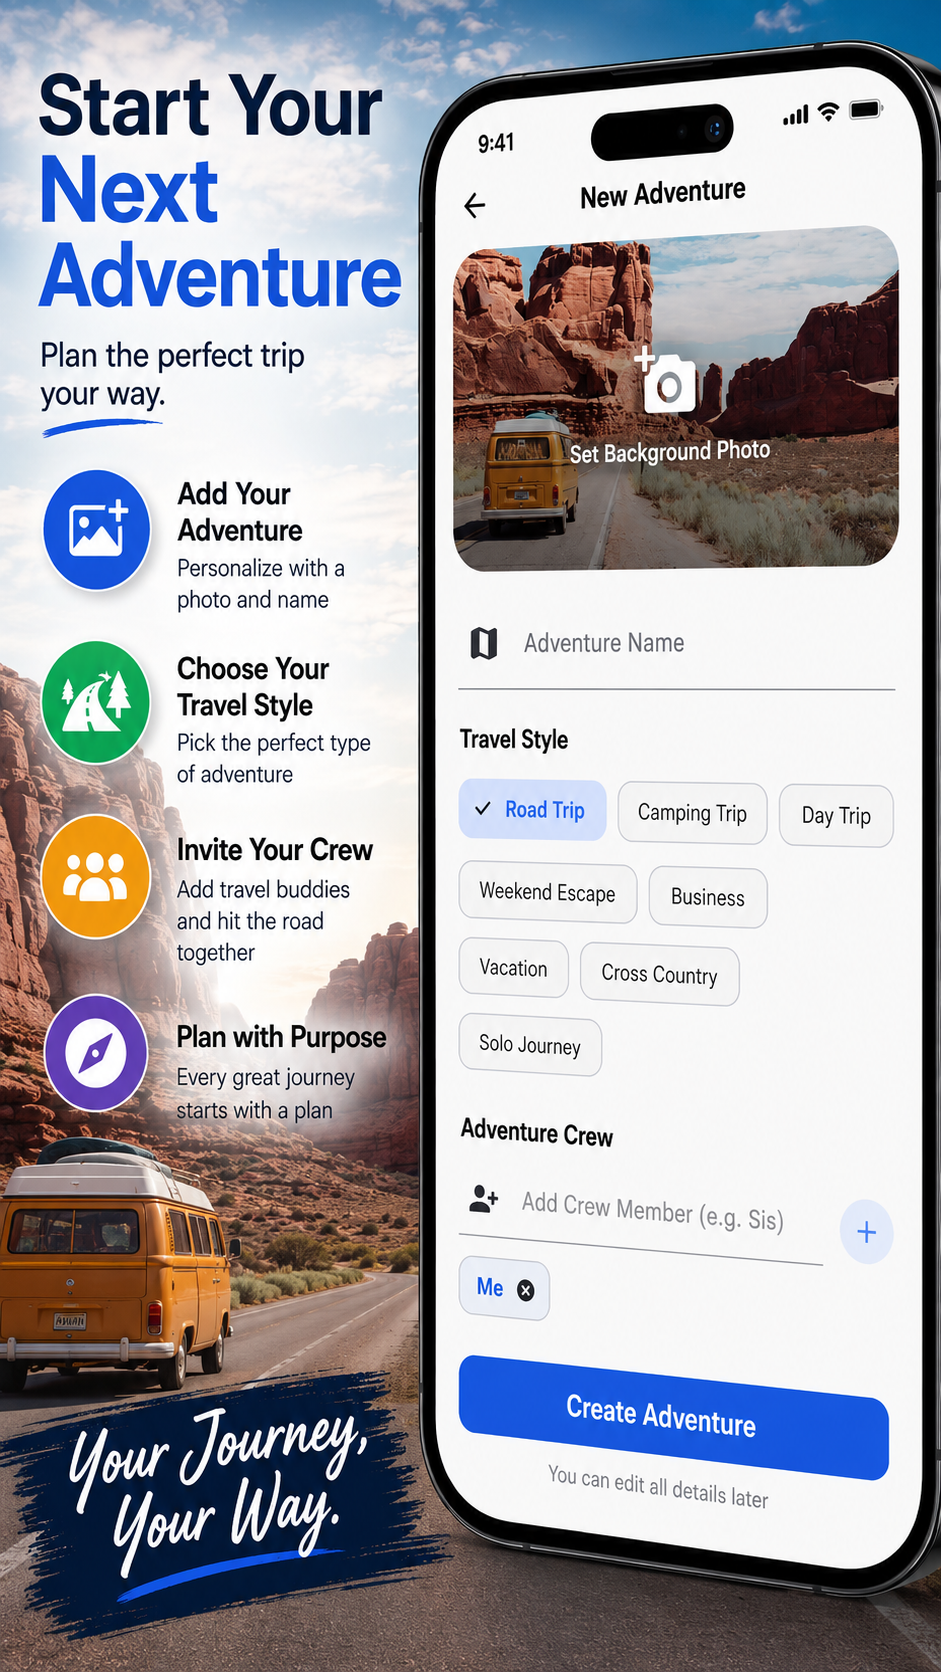
Create Your First Journey
1. Tap New Journey on the Home screen.
2. Set up your basic timeline, budget, and travel style.
3. Tap Save Adventure to lock it into your device's local memory.
Build a Multi-Stop Route
Learn to build, arrange, and manage multi-stop driving itineraries seamlessly.
1. Initialize: Click Plan Your Adventure.
2. Describe: Give this specific leg of your road trip a name or quick description.
3. Starting Point: Enter your departure address.
4. Add Stops: Click Add Stop to map out multiple destinations along the way. (The Pro version unlocks unlimited stops!).
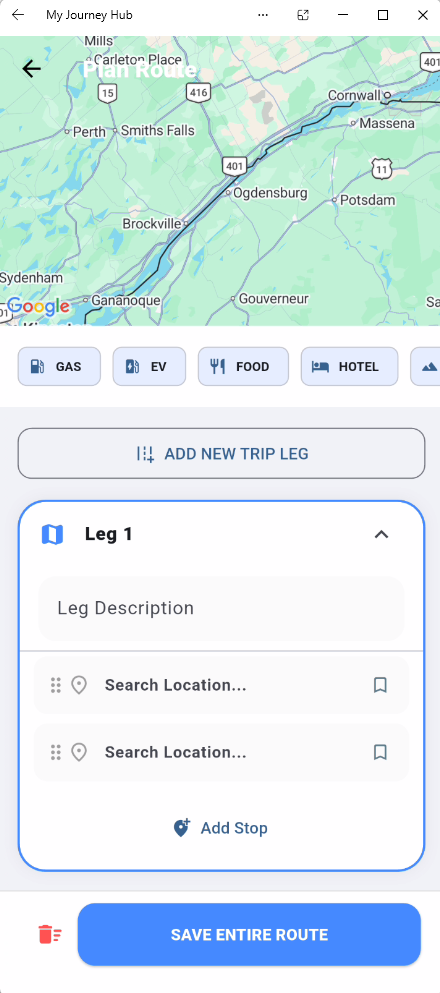
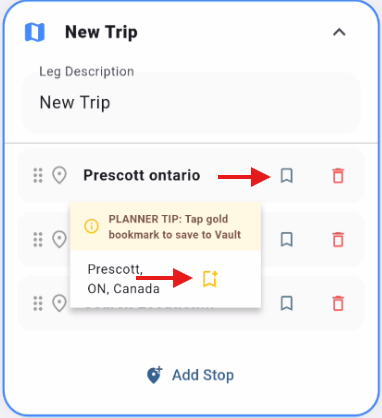
5. Saved Places: Tap the gold bookmark to save a new address straight to your personal Vault, or click it before typing to instantly load one of your pre-saved favorites.
6. Organize Your Route: Want to rearrange your itinerary? Simply tap and hold the 6 horizontal dots next to any stop until it floats, then slide it up or down to change your driving order.
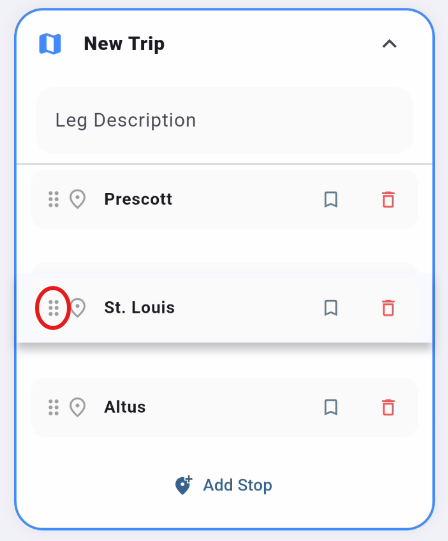
7. Finalize: Click Save Entire Route once you have all your stops lined up.
8. Sync: Head back over to the main Route Tab and click Refresh to see your new path drawn out on the map.
Find Stops Along the Way
Easily find essential stops along the way like gas, food, and lodging.
1. Tweak Your Trip: Go to the main Route Tab and tap Modify Trip to start adding new stops to your itinerary.
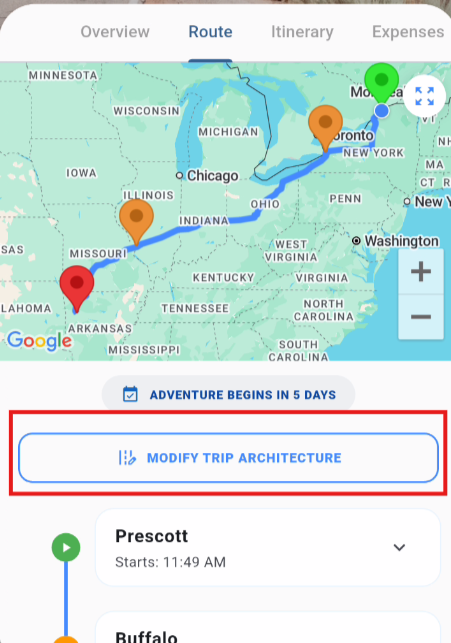
You have two simple ways to hunt for great stops on the highway: Current Location Search (for things right around you now) and Look-Ahead Search (for planning a stop further down the road).
Option 1: Searching from Your Current Location
2. Pick a Category: Choose what you're looking for right now—like Gas, Food, or a Hotel. (Note: Upgrading to the Pro tier unlocks even more specialty categories).
3. Adjust Your Search Area: Use the sliders to change how far out you want to search (the radius) and limit how many results show up on your screen at once.
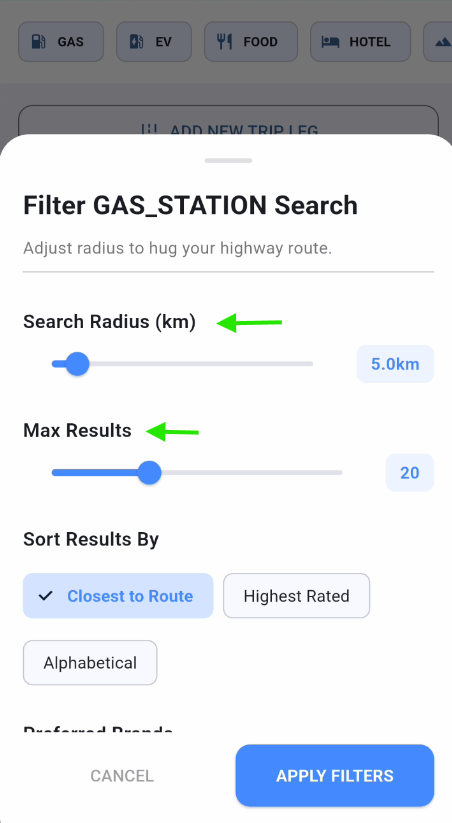
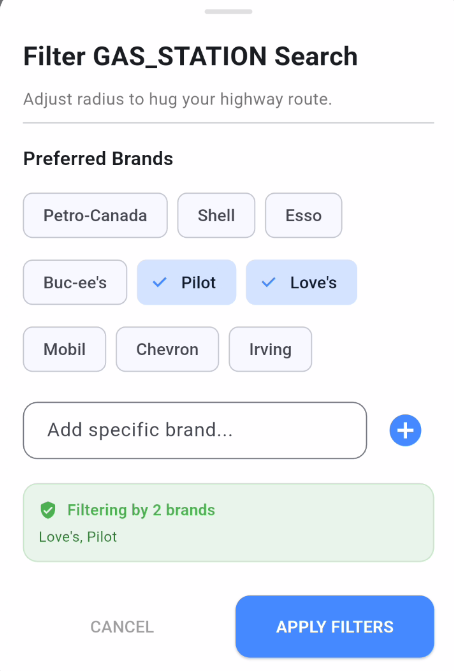
4. Filter by Your Favorite Brands: Only want to stop at specific gas stations or fast-food joints? Select your favorite brands from the list, or type in a custom name. Tap Apply Filters when you're ready.
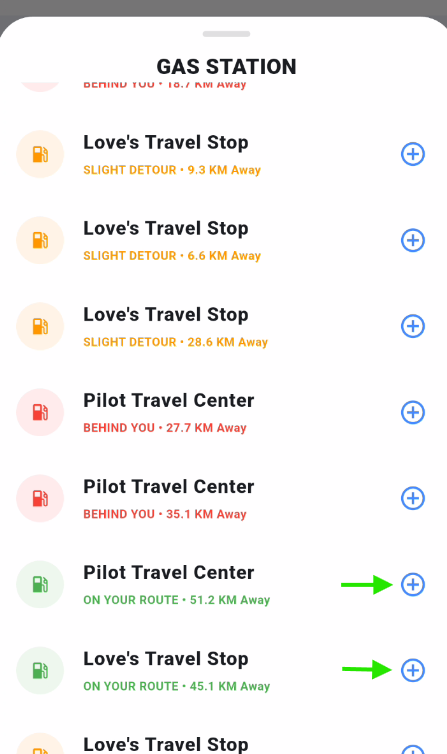
5. Check the Direction: The search results are smart—they will instantly tell you exactly where a stop is relative to your drive, including its distance and whether it is:
- Behind You (You missed it—requires turning around)
- A Slight Detour (Just a quick minute or two off the main highway)
- On Your Route (Perfectly right along your current path)
6. Add the Stop: When you spot a place you like, simply click the + (Add) button next to it to toss it into your itinerary.
7. Lock It In: The new stop will appear right inside your active trip leg. Just click Save Route to save it to your phone.
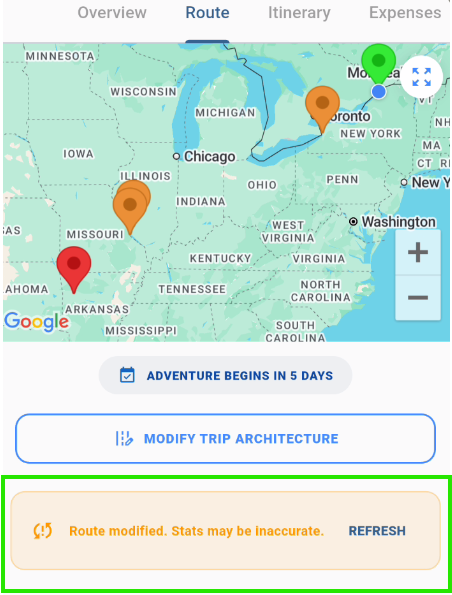
8. Update the Map: Go back to your main Route Tab and tap Refresh to see your new stop perfectly drawn into your road trip map.
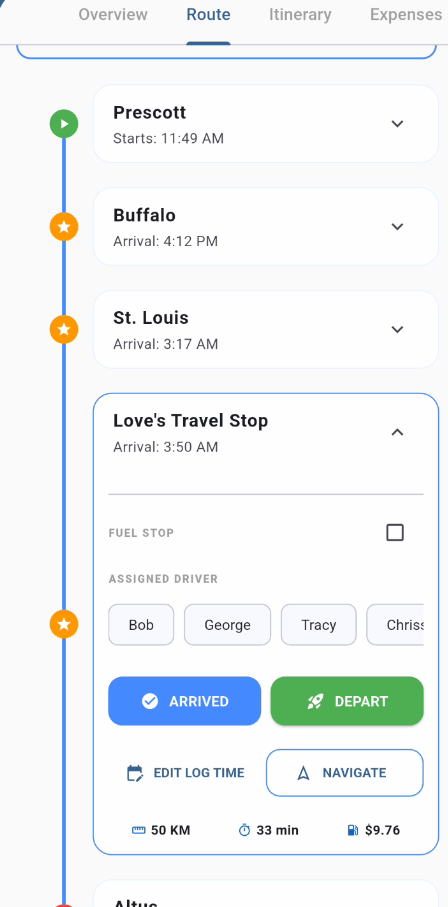
9. Hit the Road: Take a look at your updated route and tap to launch turn-by-turn navigation straight to your new stop!
Option 2: Using Look-Ahead Search
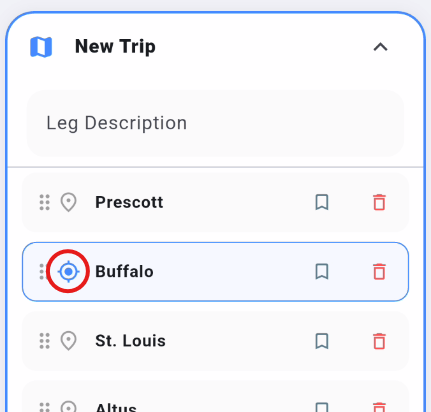
1. Plan Ahead for Later Stops: Want to find a lunch spot near a town you won't reach for another two hours? Tap the small Map Icon right next to that future stop on your itinerary list.
2. Search the Area Ahead: Select your category (like Food) and adjust your filters. The app will search around that *future* destination instead of where you are sitting right now.
3. Save and Close: Pick the spot you want, save your route, and you're all set for later in the day!